So sad ... a tragedy has happened to me today. I have written 3 paragraphs of what I have done on Sunday but then right on when I switch space of my Redmi Note 3, suddenly the blogger apps was already closed and I couldn't find anything on the draft section. Huhuhu, so now I have to rewrite.
Please wait while I recall of what I have written ...
As usual on Sundays, I started my day with getting lazy and then go to the gym and then out for lunch. As the result, I had lunch very late, normally after 3 pm. One of the thing that I like about having lunch after the gym session was that normally your body will tell you what to eat. This, I rarely have on my regular days. This time around, I wanted to have satay, seems like protein is something that I need.
Before I start to write about the satay, let's talk about the gym session. What I call gym session is basically only treadmil running, a little bit of core exercise and weight-lifting. Not the serious type of weight-lifting where you have to lie down and so on. But more on the lighter side.

This is the weights that I normally use. Yes, you guess right, it's the top left one, 1.25 kg each hehehe. Come on, I don't intend to bodybuild, just to give some muscles for my arm since my washing machine has a leaked pipe, so I have to pour the water everytime using piles.
So, about the treadmill run, it seems like on Saturday I don't have enough food intake. As I wrote earlier, my METS are measured at 5.5 in the machine, and even when I calculate at the website, it shows 8 for approximately 45 minutes, you all agree that I should replace it with proper food. And what I have that day? Just one cup noodle and 1 box of lasagna. Yeah, the laziness got the best of me and thats what I had the whole day. Given that, when I want to run, my body told me not to do as much as yesterday. So, I listened to it.
I set the incline at 1 and then speed all the way up tp 7.5, and gradually comes down to 6.0. And guess what happen? By the time I reach 7.3 when slowing down, I decided to just brisk walking. And as the result, my METS are measured at only 4.5.

Again, when I submit my parameters to this website, http://www.exrx.net/Calculators/WalkRunMETs.html, I have 7.1 METS. For your reference, as the speed I put 6.14, grade 1, bodyweight 50 kg and 45 minutes duration. Lastly, just to complement my exercise, I normally do 30 seconds plank, plus 20 seconds side plank each side.
So, having decided that I would go for satay, I head on to Pasar Seni. Actually, there is another satay place which I would recommend but it's quite far and I have no mood to go to a distance place. Arrived at Pasar Seni, I made an order at one of the kiosk. The one who sell is an Indonesian lady but I'm sure the one who owns the place is Chinese hehhehe. She offered me if I want to buy 6 sticks or 12 sticks. I opted for 12 sticks because I thought maybe I can finish it off but when it came, pheww, it's quite big lol.

And on top of that, I also ordered 2 tiny plate of Dim Sum. Honestly, I feel embarassed because I sat in the center and with this big plate of mine, people would think that I am greedy ... So, my advise to you guys, better to take the smaller portion and buy more should you feel you want more. Half way through the satay, I feel like want to give up, really. But I decided, let's take it slow, and yes I made it.
As for today, not much of an update except that I have to face upset clients whose reports are pending due to some mispriority. Not by me, but I was forced to keep it aside. This is a lesson learnt by itself actually. I was contemplating whether to say out loud that it is not my intention to delay their commercial report but then again, I should have known that it will make them upset. In the end, I just apologize because there were so many meetings which I can't skip so it delays the report. For sure, they won't be satisfied but hey, what else can I do ...
Please wait while I recall of what I have written ...
As usual on Sundays, I started my day with getting lazy and then go to the gym and then out for lunch. As the result, I had lunch very late, normally after 3 pm. One of the thing that I like about having lunch after the gym session was that normally your body will tell you what to eat. This, I rarely have on my regular days. This time around, I wanted to have satay, seems like protein is something that I need.
Before I start to write about the satay, let's talk about the gym session. What I call gym session is basically only treadmil running, a little bit of core exercise and weight-lifting. Not the serious type of weight-lifting where you have to lie down and so on. But more on the lighter side.

This is the weights that I normally use. Yes, you guess right, it's the top left one, 1.25 kg each hehehe. Come on, I don't intend to bodybuild, just to give some muscles for my arm since my washing machine has a leaked pipe, so I have to pour the water everytime using piles.
So, about the treadmill run, it seems like on Saturday I don't have enough food intake. As I wrote earlier, my METS are measured at 5.5 in the machine, and even when I calculate at the website, it shows 8 for approximately 45 minutes, you all agree that I should replace it with proper food. And what I have that day? Just one cup noodle and 1 box of lasagna. Yeah, the laziness got the best of me and thats what I had the whole day. Given that, when I want to run, my body told me not to do as much as yesterday. So, I listened to it.
I set the incline at 1 and then speed all the way up tp 7.5, and gradually comes down to 6.0. And guess what happen? By the time I reach 7.3 when slowing down, I decided to just brisk walking. And as the result, my METS are measured at only 4.5.
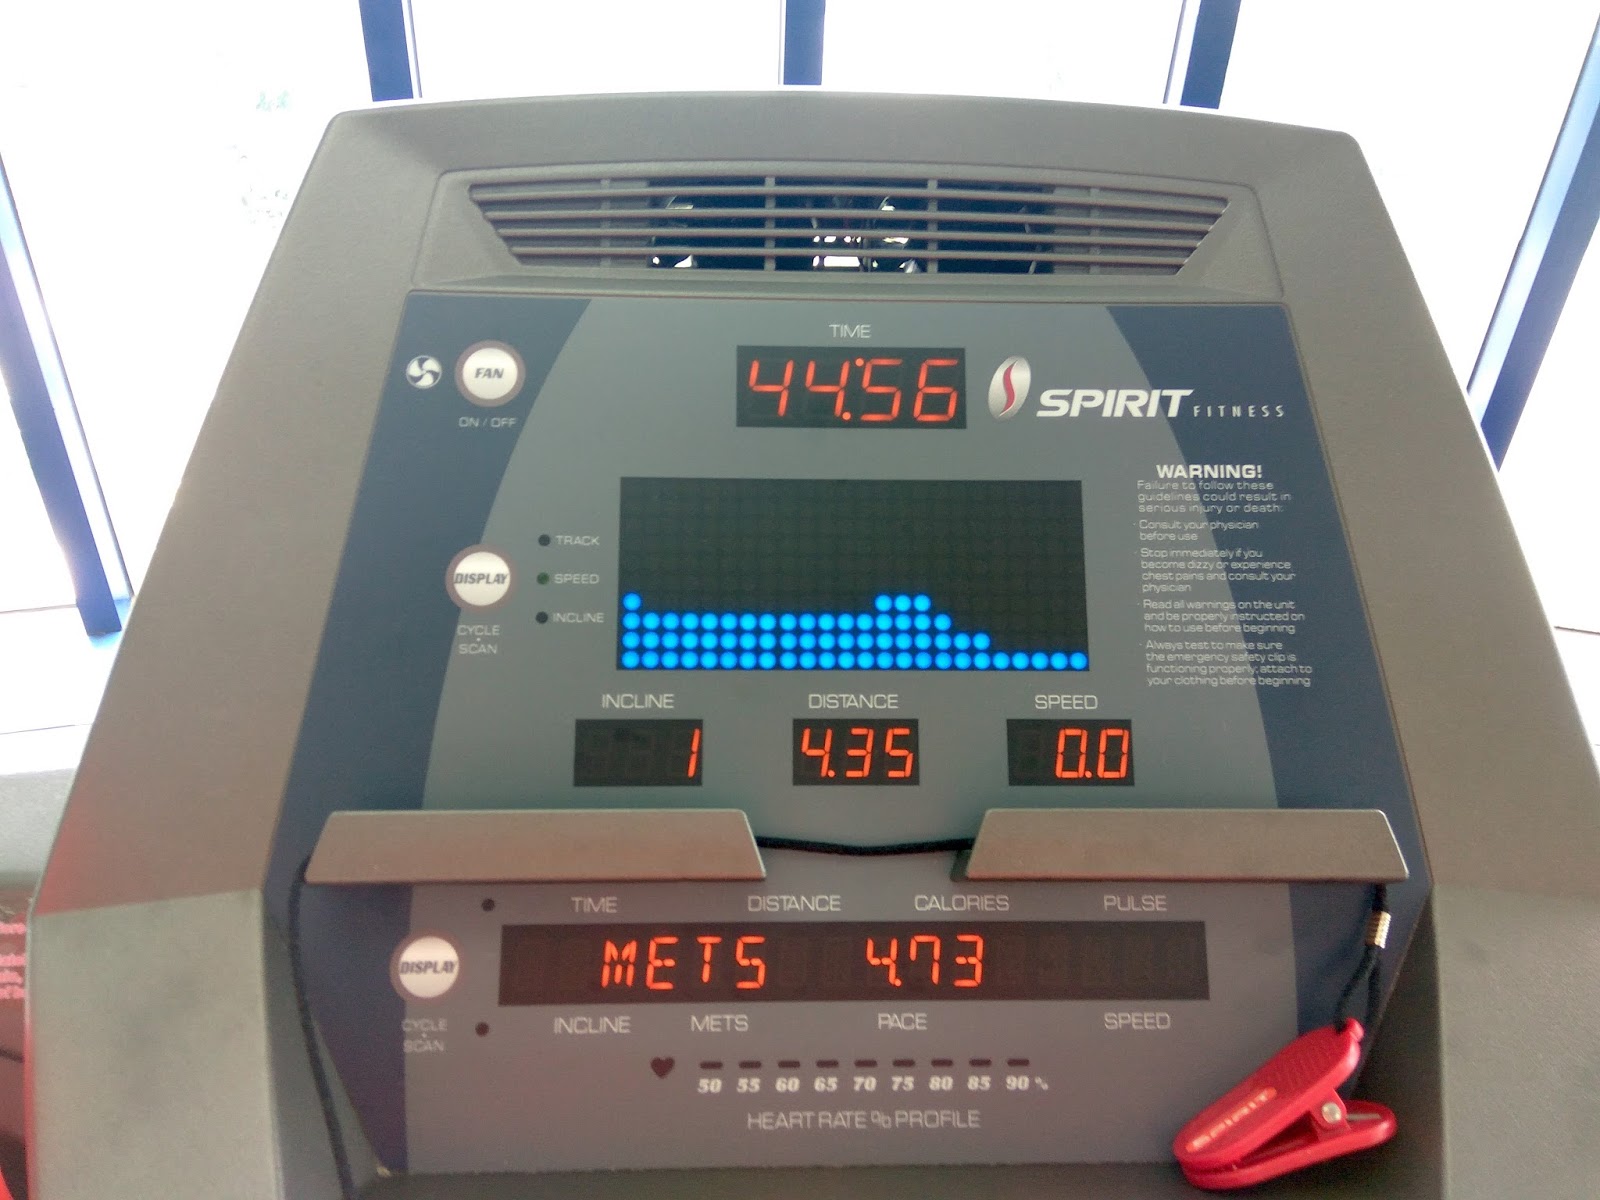
Again, when I submit my parameters to this website, http://www.exrx.net/Calculators/WalkRunMETs.html, I have 7.1 METS. For your reference, as the speed I put 6.14, grade 1, bodyweight 50 kg and 45 minutes duration. Lastly, just to complement my exercise, I normally do 30 seconds plank, plus 20 seconds side plank each side.
So, having decided that I would go for satay, I head on to Pasar Seni. Actually, there is another satay place which I would recommend but it's quite far and I have no mood to go to a distance place. Arrived at Pasar Seni, I made an order at one of the kiosk. The one who sell is an Indonesian lady but I'm sure the one who owns the place is Chinese hehhehe. She offered me if I want to buy 6 sticks or 12 sticks. I opted for 12 sticks because I thought maybe I can finish it off but when it came, pheww, it's quite big lol.

And on top of that, I also ordered 2 tiny plate of Dim Sum. Honestly, I feel embarassed because I sat in the center and with this big plate of mine, people would think that I am greedy ... So, my advise to you guys, better to take the smaller portion and buy more should you feel you want more. Half way through the satay, I feel like want to give up, really. But I decided, let's take it slow, and yes I made it.


As for today, not much of an update except that I have to face upset clients whose reports are pending due to some mispriority. Not by me, but I was forced to keep it aside. This is a lesson learnt by itself actually. I was contemplating whether to say out loud that it is not my intention to delay their commercial report but then again, I should have known that it will make them upset. In the end, I just apologize because there were so many meetings which I can't skip so it delays the report. For sure, they won't be satisfied but hey, what else can I do ...


